
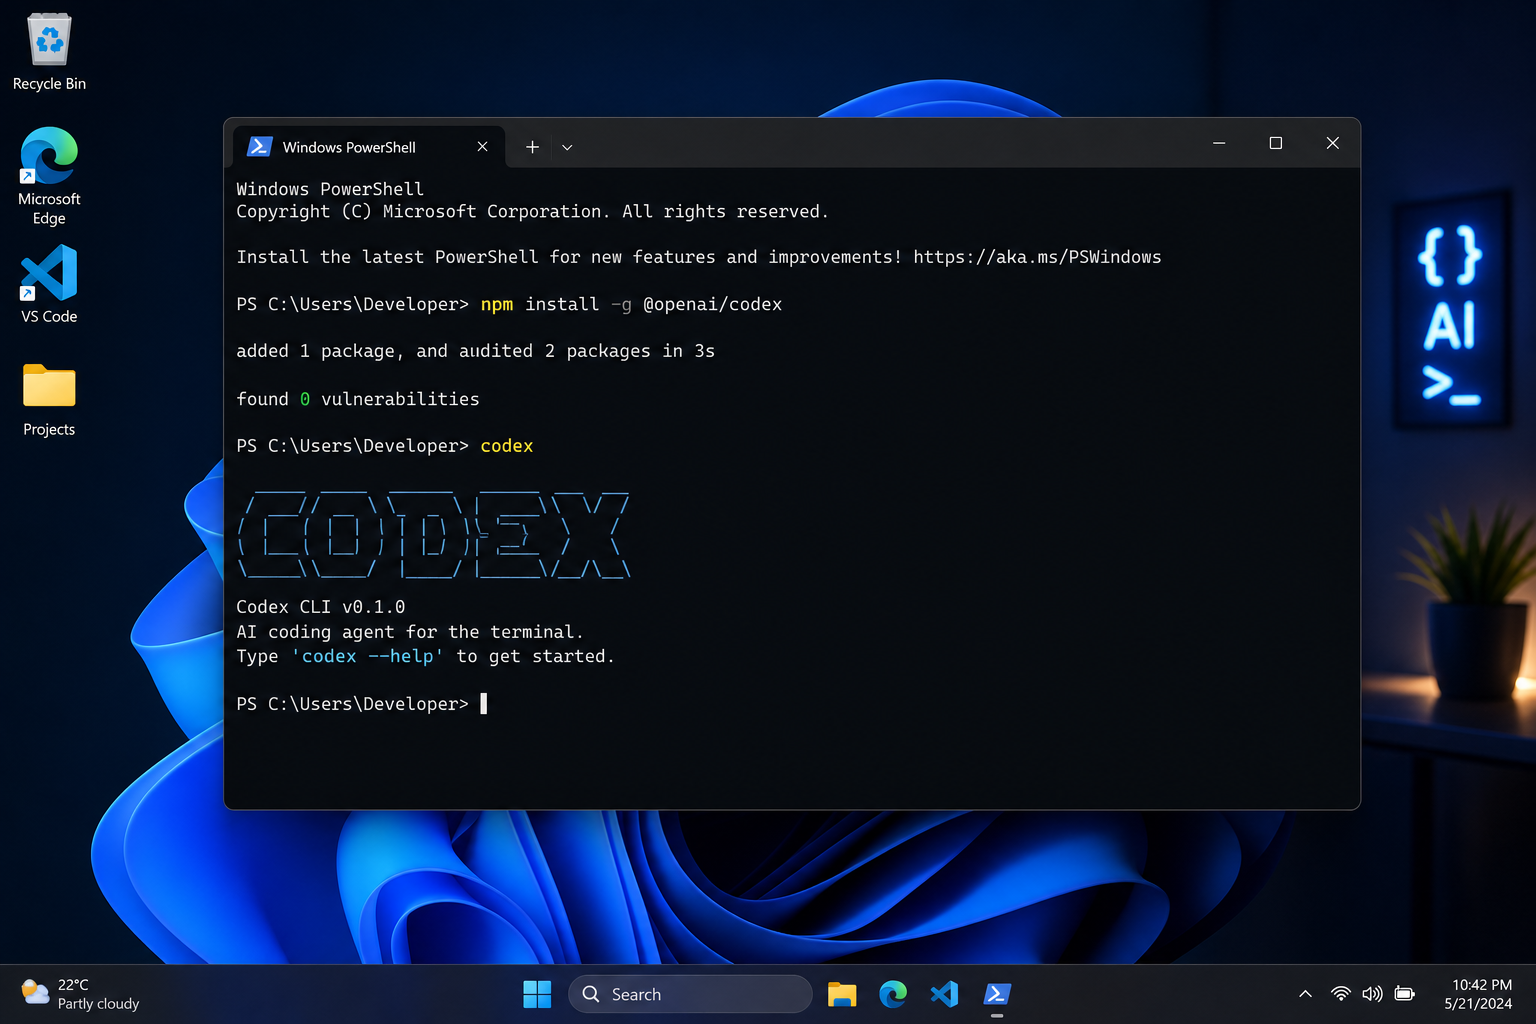
Installing OpenAI Codex on Windows 11 or Windows 10 takes less than ten minutes once you know what to grab and in what order. Codex is OpenAI’s AI-powered coding agent — available as a native desktop app via the Microsoft Store and as a lightweight command-line tool (Codex CLI) — and since May 2026 it runs fully natively on Windows without needing WSL or a virtual machine. Whether you want the GUI experience or prefer terminal-first workflows, this guide walks you through every step.
What Is OpenAI Codex and Why Install It on Windows?

OpenAI Codex is an AI coding agent that understands natural language instructions and translates them into working code, shell commands, and file edits — all inside a sandboxed environment on your local machine. It underpins tools like GitHub Copilot and has now been extended into a standalone application and CLI that any developer can run directly on their PC.
Since its native Windows launch in 2026, Codex has gained a PowerShell-native sandbox that enforces bounded permissions without requiring Linux subsystem emulation. That means your existing Windows developer environment — your Git repos, your IDE, your file paths — works exactly as expected. For developers on Windows 11 or Windows 10, this is a significant step up from earlier workarounds.
System Requirements Before You Install OpenAI Codex on Windows

Meeting the prerequisites saves you frustration later. Here is what you need before starting the OpenAI Codex setup on either platform:
- Operating system: Windows 11 (any edition) or Windows 10 (64-bit, version 1903 or later)
- Microsoft account: Required to sign in to the Codex desktop app via your ChatGPT or OpenAI account
- OpenAI API key: Needed for Codex CLI — generate one at platform.openai.com under API keys
- Node.js 18+: Required for Codex CLI installation via npm
- RAM: 8 GB minimum; 16 GB recommended for smooth agent performance alongside your IDE
- Internet connection: Codex calls the OpenAI API in real time — a stable connection is essential
- PowerShell 5.1 or later: Pre-installed on Windows 10 and Windows 11; update via Windows Update if needed
If your machine is running an older or under-resourced version of Windows, consider upgrading first. A genuine Windows 11 Pro licence gives you full access to the developer-grade features — including the Windows Sandbox environment that Codex CLI relies on for isolated code execution.
Method 1: Install the Codex Desktop App from the Microsoft Store
The Codex desktop app is the fastest route to OpenAI Codex setup on Windows — no command line required. Follow these steps:
- Open the Microsoft Store — press the Windows key, type Microsoft Store, and hit Enter.
- Search for “Codex” — type it into the search bar and select the official OpenAI Codex listing.
- Click Install — the Store handles the download and installation automatically. The app is free to install.
- Launch Codex — once installed, click Open or find Codex in the Start menu.
- Sign in with your ChatGPT or OpenAI account — if you do not have one, create a free account at openai.com first.
- Complete onboarding — Codex will walk you through connecting a project directory and choosing your sandbox mode (native Windows PowerShell sandbox or WSL if you have it installed).
- Open or clone a repository — point Codex at a local project folder and start issuing natural language instructions.
The desktop app is the recommended starting point for most users wanting to get Codex on Windows 11 quickly, particularly those not yet comfortable with package managers or terminal tooling.
Method 2: Codex CLI Windows Install via npm

Developers who prefer terminal-based workflows will find the Codex CLI setup even more powerful — it integrates directly into existing shell scripts, CI pipelines, and IDE terminals. Here is the full process to install Codex CLI on Windows:
Step 1 — Install Node.js
Download the latest LTS release of Node.js from nodejs.org. Run the installer, accept the defaults, and tick the box to add Node.js to your PATH. Restart any open terminals after installation. Confirm it worked by running node --version — you should see v18 or higher.
Step 2 — Install Codex CLI via npm
Open PowerShell as Administrator (right-click the Start button → Windows Terminal (Admin) or PowerShell (Admin)) and run:
npm install -g @openai/codexnpm downloads the package globally, making the codex command available system-wide. The package is maintained in the official openai/codex GitHub repository.
Step 3 — Set Your OpenAI API Key
Codex CLI authenticates via your OpenAI API key. Set it as an environment variable so it persists across sessions:
[System.Environment]::SetEnvironmentVariable("OPENAI_API_KEY", "your-api-key-here", "User")Replace your-api-key-here with the key you generated on the OpenAI platform. You can verify it is set by running echo $env:OPENAI_API_KEY in a new PowerShell window.
Step 4 — Run Your First Codex CLI Task
Navigate to a project directory and run:
codexCodex will enter interactive mode. Type a plain-English instruction — for example, “Add a README.md that explains this project” — and Codex will propose the changes for your approval before executing them. The native Windows sandbox enforces file-system and network boundaries so Codex cannot make changes outside the scope you have authorised.
Configuring the OpenAI Codex Setup for Your Workflow
Once Codex is running, a few configuration steps unlock its full potential:
- Create an
AGENTS.mdfile in your project root — this plain-text file tells Codex how your codebase is structured, what commands to use for testing, and any constraints to follow. Think of it as a standing brief for your AI coding agent. - Set the approval mode — by default Codex operates in suggest mode, showing proposed changes for your approval. You can switch to auto-edit for trusted projects, but always start with suggest on new codebases.
- Integrate with VS Code — install the Codex extension from the VS Code Marketplace to surface agent suggestions directly in your editor alongside GitHub Copilot. For a comparison of how the two tools complement each other, see our guide on GitHub Copilot for developers.
- Review AI PC requirements — if Codex feels sluggish, check whether your system meets the RAM thresholds for AI workloads. Our article on Windows 11 AI PC RAM requirements explains why 16 GB is fast becoming the baseline.
Troubleshooting Common Codex Install Problems on Windows
Even a smooth Codex CLI Windows install can hit a few snags. Here are the most common issues and their fixes:
Codex App Hangs on the OpenAI Logo
This typically occurs after a Windows 11 feature update (particularly builds beyond 26200). The fix is to fully uninstall the Codex app from the Microsoft Store, restart your PC, then reinstall. If the problem persists, check the OpenAI Community forums — OpenAI usually patches these within days of a major Windows update.
npm Not Recognised After Node.js Install
If PowerShell returns “npm is not recognised” after installing Node.js, your PATH variable was not updated correctly. Go to System Properties → Advanced → Environment Variables and confirm the Node.js install directory (e.g. C:\Program Files\nodejs) appears in the Path system variable. Restart your terminal and try again.
Codex CLI Returns an Authentication Error
This means your API key is either missing, expired, or incorrectly set. Double-check the key in your OpenAI platform dashboard, regenerate it if necessary, and re-run the environment variable command from Step 3 above. Always open a fresh PowerShell window after setting environment variables.
Codex Desktop App Not Loading on Windows 10
Some users on Windows 10 have reported extremely high CPU usage during launch with no result. Ensure your Windows 10 installation is fully updated via Windows Update, then try disabling any third-party antivirus temporarily during the first launch — security software can block the sandboxed execution environment. If the issue continues, the Codex CLI method is a reliable alternative on Windows 10 since it does not depend on the sandbox layer.
ExecutionPolicy Blocking PowerShell Commands
If a script execution policy error appears, run the following in an elevated PowerShell window before retrying the npm install:
Set-ExecutionPolicy -ExecutionPolicy RemoteSigned -Scope CurrentUserThis allows locally written scripts to run while still requiring remote scripts to be signed — a sensible balance for developer machines.
Getting the Most from Codex on Windows
With Codex running, a few practical habits will dramatically improve the quality of results:
- Be specific in your prompts. Instead of “fix the bug”, say “the login function in auth.js throws a TypeError on line 42 when the user object is null — fix it without changing the function signature.”
- Use the
--approval-modeflag carefully. Full auto mode is powerful but should only be used on code with good test coverage so you can catch unintended changes quickly. - Commit frequently. Because Codex can make multiple file edits in one session, committing to Git before each Codex run gives you a clean rollback point.
- Review the sandbox logs. The native Windows sandbox records every command Codex executes. Reviewing these logs periodically keeps you in control and helps you spot patterns in how Codex interprets your instructions.
FAQ
Is OpenAI Codex free to install on Windows?
The Codex desktop app and Codex CLI tool are both free to download and install. However, running Codex tasks consumes OpenAI API credits, so you will need an OpenAI account with a funded API key or an active ChatGPT Plus/Pro subscription to use it in practice. Pricing is based on token usage and varies by model.
Do I need WSL to install OpenAI Codex on Windows?
No — since May 2026, OpenAI Codex setup on Windows runs natively in PowerShell using a Windows-native sandbox. WSL is supported if you already use it, but it is no longer a requirement. Most Windows 11 and Windows 10 users can complete the entire setup in a standard PowerShell session.
What is the difference between the Codex desktop app and Codex CLI on Windows?
The desktop app provides a graphical interface with project management, onboarding, and visual diffs — ideal for those who prefer GUI tools. Codex CLI Windows is a terminal-based agent suited for scripting, pipeline integration, and developers who live in the command line. Both use the same underlying OpenAI model and produce the same quality of output.
Can I use Codex CLI alongside GitHub Copilot in VS Code?
Yes — the two tools complement each other well. GitHub Copilot handles inline code completions and chat within the editor, while Codex CLI handles broader agentic tasks like refactoring whole files, writing tests, or modifying project structure from the terminal. Many developers run both simultaneously without conflict.
Why is the Codex app crashing or hanging on Windows 11?
Crashes most commonly occur after a Windows 11 feature update changes the sandbox environment. The solution is almost always to uninstall and reinstall the Codex app from the Microsoft Store after the update. OpenAI typically releases a compatible app update within a few days of each major Windows build. In the meantime, Codex CLI Windows is a stable fallback that is unaffected by these app-layer issues.
